18 December 2004
(continued from 12/10/2004)
Thanks go to Ulrich in Germany for spotting some errors in the class-AB2 amplifier schematic part values and voltages. The schematic has been corrected.
Subject: Sandman error takeoff
Thank you for putting out a wonderful resource for everyone. The Aikido amplifier looks like my next project and future line stage. And thanks for resurrecting the Sandman circuit. I am embarrassed to say that in spite of my 23 years in the analog electronics field and my having taught electronics for three years in a community college, I have never read his article or seen his topology used. Yet, I believe that his approach is pure genius. Twenty years ago I had tried to come up with a similar circuit/method but I failed because I insisted on using a non-inverting amplifier as the basis of a composite amplifier.
However, one problem I see with using transformer-coupled amplifiers is the phase shifts creating distortion that Sandman’s distortion error take off will not be able to overcome. Therefore, might not a better--and cheaper--course to follow be to use a cheap but high quality solid-state amplifier to provide the basis of a composite amplifier that also used small high quality tube OTL amplifiers. It seems to me that the “computer OTL” amplifier topology could be used with a single 6BX7 as output tubes. This amplifier could makeup the second tier of error take off. The last amplifier could be your Aikido Amplifier with a 12AX7 input and 6BX7 output. Both of these tube amplifiers are inverting, so something slightly different will be needed to get the error take off scheme to work. Just a suggestion and thanks again.
Bill
USA
Thanks for the kind words. Yes, a composite mixed-technology amplifier is possible and it would certainly be cheaper than the all-tube version. And without causing too much controversy, output transformers are simply a headache, when used in feedback-based amplifier. But what if instead of three tube transformer-coupled amplifiers in tandem, three tube amplifiers in tandem are used with only one common output transformer. In other words, what if the error-take-off amplifiers used feedback loops outside of an output transformer. In this configuration, the output transformer would effectively be the common load. True, the transformer’s own distortion would lie outside the feedback loop, but then so would its phase shifts. In such a composite amplifier, each tube amplifier could be configured in a totem-pole topology, so as to eliminate the need for a balanced input signal, greatly simplifying the feedback loops.
Subject: PDFs & DC coupling
Welcome back to the web. I appreciate all the blog postings, but they are almost impossible to print. I like to read them away from home and work and I do not own a laptop. Maybe you could provide a PDF file of each blog. I would like to know if the [computer] OTL amplifier could be direct coupled, OCL and OTL. Such an amplifier would require a negative power supply for the bottom half of the output tubes, but since you have already provided one, why not use it? And yes I did read your blog/argument on coupling capacitors, but it takes me a long to change my mind ;)
Raymond G
Brazil
At work? You are not being paid to read the Tube CAD Journal are you? One user of my software told me that he often uses my software at work, designing his own projects, but since he is in electrical engineering, his boss cannot tell that he is having a good time, as his computer screen is filled with graphs.
I will think about the PDFs, as you are at least the third reader to ask for them. I wondered how long it would take before someone asked for a coupling-capacitor-less version of the computer amplifier. Below is a such a remake.
 Click on image to see closeup Click on image to see closeup
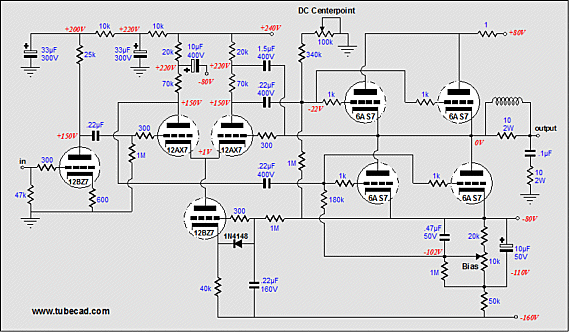
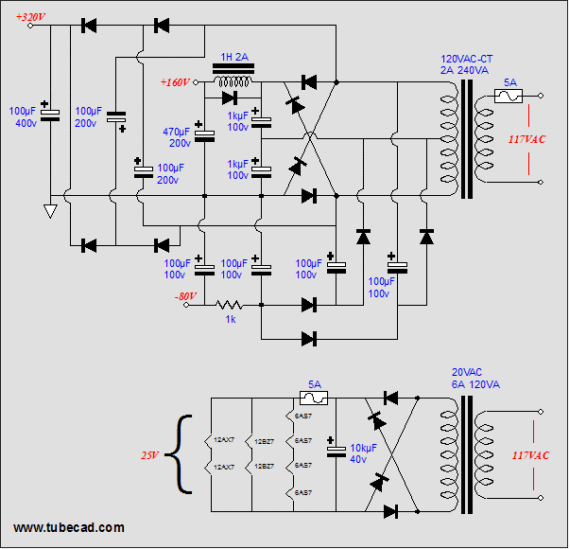
The amplifier’s topology has been slightly altered (or drastically, depending on your perspective). The output stage now functions as grounded-cathode amplifiers rather than cathode followers. Why? The negative power supply brings with a new noise source, which the previous version sidestepped. The bottom output tubes’s cathodes attach directly to the negative 80-volt power supply rail, which holds a good deal of power supply ripple, as the power supply is not regulated. On the other hand, the grid of these bottom output tubes do not lug any of this noise. The result is that the power supply noise would be amplified, if we stuck to the old topology. By shifting the driver stage’s connection to the amplifier’s output from the top triodes to the bottom triodes, we can also shift the driver stage’s connection that had gone to ground to the negative power supply rail instead. (For much more complete analysis see my article on Totem-Pole Output Stage PSRR)
The DC offset becomes much more important without the coupling capacitor, so I would place a voltmeter on the front panel to read the offset each time the amplifier is turned on. Alternatively, a DC servo loop can be added. In the schematic below, we see a simple DC servo that uses a modified heater power supply to supply its power supply rails. The OpAmp reads the amplifier's DC offset and offers a correcting reference voltage to bring the output in line with ground. The OpAmp’s inputs are centered at ground and its output is DC shifted negatively—via the two-resistor voltage divider—to suit the output tubes.

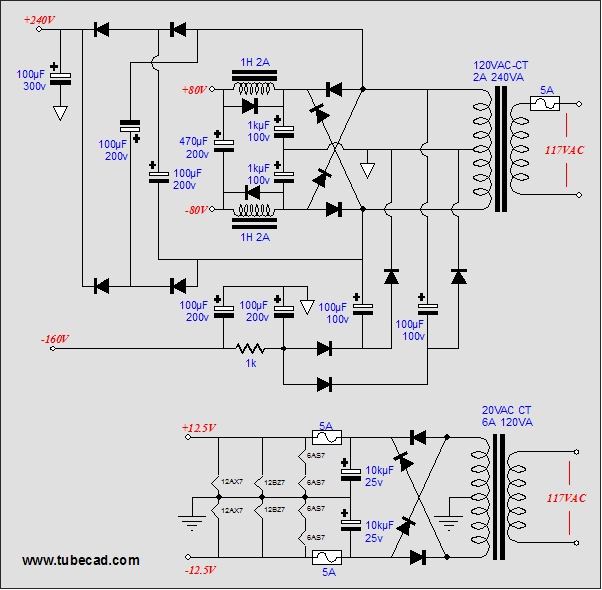
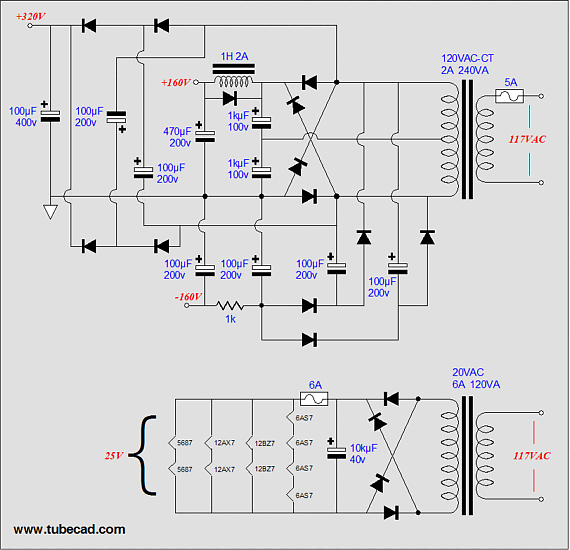
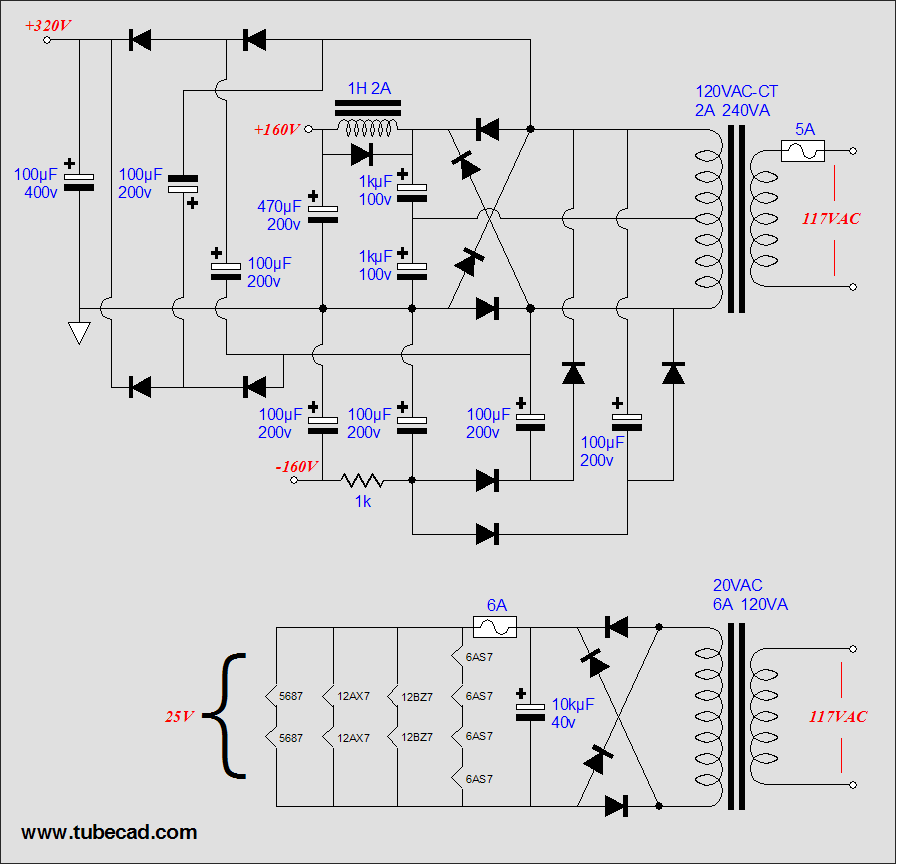
The entire power supply is shown below. Note the lowered B+ for the input and driver stages. Also note the new capacitor ratings.
//JRB
10 December 2004
(continued from 12/09/2004)
The power supply schematic posted yesterday held a miswiring: the negative power supply rail would put out –160 volts, not the desired –80 volts. The schematic has been corrected.
Before anyone asks, let me say that the amplifier can be restored to a higher output wattage by three means. The first is to use a much high power supply voltage for the output stage. By returning to the original 160 volts of B+ voltage, the amplifier can force a lot more current out of the output tubes before hitting positive grid current conduction. The distortion will be quite a bit higher, as the idle current will have to be reduced to keep within the 6AS7’s plate dissipation limit, but this may not be a liability in all situations, as musicians may prefer a little grunge in the mix.
In fact, one reader from Brazil, George, wrote to explain that music loudspeaker enclosures often hold four 12-inch or 15-inch fullrange drivers, wired in series/parallel for an 8-ohm total impedance. Thus, rewiring the four drivers into a 32-ohm load would be easy. Below is an example of how to hookup a toggle switch to allow easy switching from 8 to 32 ohms.
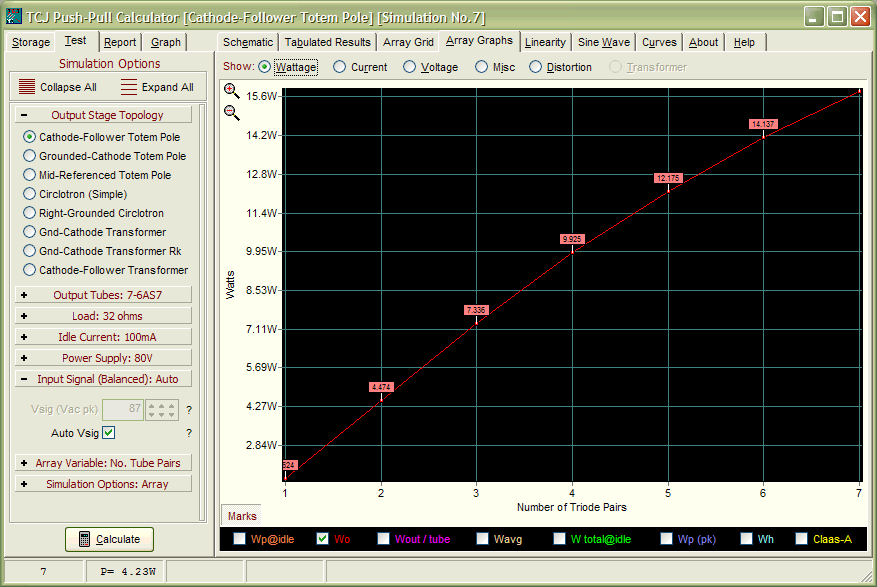
The second path to more watts is to increase the number of output tubes. While more tubes will mean more watts, the price is a lot more heat and heavier power supply transformers. Below is a graph from TCJ Push-Pull Calculator that plots output wattage against the number of triode pairs used.
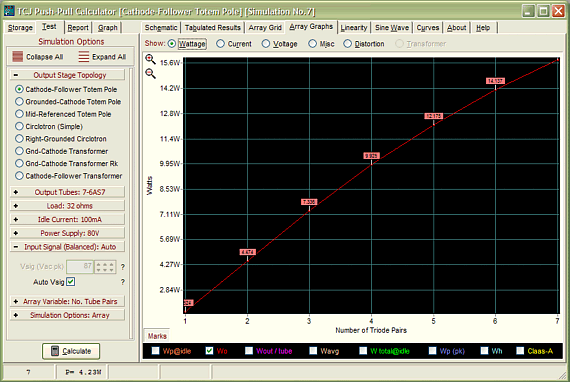 Click on screen capture to see enlargement Click on screen capture to see enlargement
The third way to up the wattage, but without upping the B+ voltage, is to allow the output tubes to run in positive grid current (class-AB2). Adding a DC-coupled cathode followers to the output stage will isolate the 6AS7’s grids from the 12AX7’s plates. More importantly, each 6AS7 triode can put out 400mA with 55 volts on its plate and +9 volts on its grid. This much current almost doubles the zero-grid-current limit, which in turn more than doubles the potential output into 32 ohms to 10W.
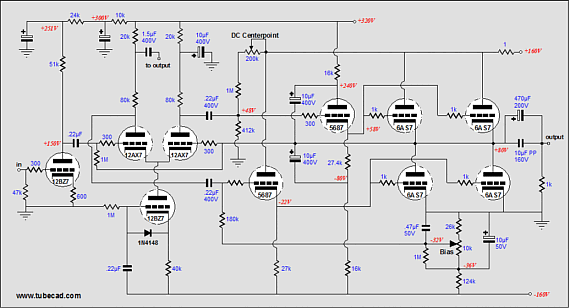 Click on image to see enlargement Click on image to see enlargement
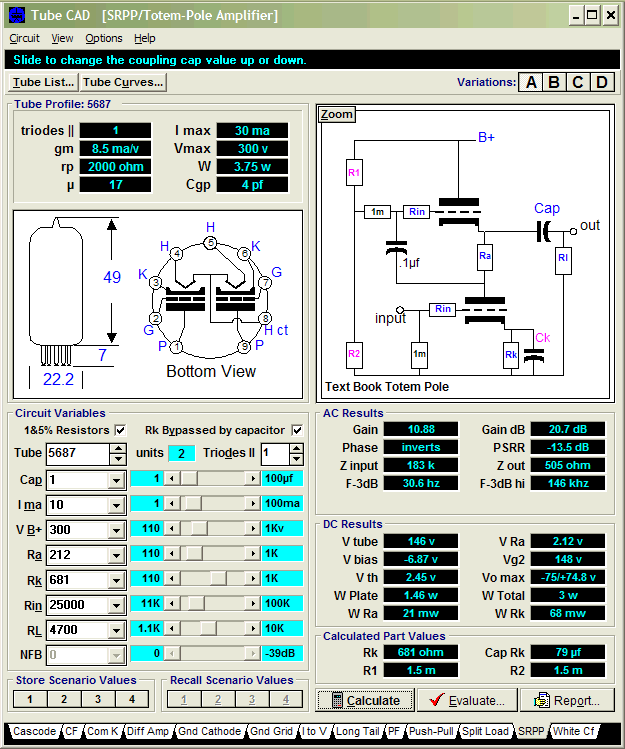
Above is the revised amplifier schematic. Each channel now holds an extra tube, a 5687 in this case, but any 12-volt-heater tube would work (although probably not as well); for example the 12AU7, 12BH7, 12SN7, 5963, 5965, or E182CC. The power supply’s negative rail must be augmented to –160 volts (as shown below), so that the cathode followers have more room to work in. Note the two capacitors that enclose the cathode follower that feeds the top output tubes. If they look suspiciously like the Transcendent OTL magic zeners, look again. The drive equalization occurs in the driver/phase-splitter stage, not at the cathode follower (if you think otherwise, just remove the capacitors and see what happens). These capacitors merely work to ensure that both cathode followers operate under similar conditions.
The power supply has the same number of parts as in the original version, but a slightly different layout to create the negative power supply rail. Compare the schematic below to the power supply schematic above; note where the negative rail diodes attach.
 Click on image to see enlargement |
|
|
|
Kit User Guide PDFs
Click image to download


This program covers
13 types of tube circuits, each one divided into four variations: 52
circuits in all. Tube CAD calculates the noteworthy results, such as
gain, phase, output impedance, low frequency cutoff, PSRR, bias voltage,
plate and load resistor heat dissipations. Which tube gives the most
gain? Tube CAD's scenario comparison feature shows which tube wins.
Windows 95/98/Me/NT/2000/XP
|
 Click on image to see enlargement
